What to Keep in a Home First Aid Kit: The Complete Guide
It’s 9 p.m. on a random Tuesday. Your kid just sliced a finger open on a kitchen knife, or your partner twisted an ankle coming down the stairs. You yank open the bathroom cabinet, dig past old sunscreen and expired cough syrup, and come up empty. No gauze. No bandages. Nothing.
Sound familiar? Most of us think we’re prepared until the moment we actually need something. A well-stocked home first aid kit isn’t about being paranoid — it’s about being ready for the small stuff that happens constantly, and the bigger stuff you hope never does.
In this guide, I’ll walk you through exactly what to keep in a home first aid kit, how to organize it, and how to keep it fresh so it actually works when you need it. Let’s get into it.
Table of Contents
- Why Every Home Needs a First Aid Kit
- How to Choose Your First Aid Kit Container
- The Core Essentials: Bandages and Wound Care
- Tools and Instruments You Can’t Forget
- Medications to Include
- Special Additions for Families with Kids
- Items for Seniors and Chronic Conditions
- Emergency and Disaster Preparedness
- How Often Should You Restock Your Kit?
- Conclusion
- FAQs
Why Every Home Needs a First Aid Kit
Here’s a stat that sticks with you: the majority of household injuries — cuts, burns, sprains, splinters — happen inside the home or right around it. The kitchen, the bathroom, the stairs, the backyard. Your home is your safe space, but it’s also where you spend most of your time, which means it’s where most accidents land too.
Having supplies within arm’s reach changes the whole experience. Instead of panicking, you handle it. Instead of driving to a pharmacy at midnight with a bleeding hand wrapped in a dish towel, you clean, cover, and move on. Preparedness is quiet like that — you don’t notice it until the moment it saves you.
Beyond convenience, there’s a real health angle. Prompt wound cleaning prevents infection. Quick icing reduces swelling. Early intervention on a burn can mean the difference between a scar and a full recovery. A kit is basically a tiny emergency room in a box.
The Difference Between a Minor Scrape and a Real Emergency
Let’s be clear about something important: a home first aid kit handles minor injuries. It is not a substitute for professional medical care.
So when do you grab the kit, and when do you grab the car keys?
Reach for the kit for small cuts, scrapes, minor burns, splinters, bug bites, blisters, and mild sprains. These are the everyday ouchies that respond well to basic care at home.
Call emergency services or head to urgent care for deep wounds that won’t stop bleeding, burns larger than your palm, suspected fractures, head injuries, difficulty breathing, chest pain, or signs of severe allergic reaction. A good kit buys you time and comfort — it doesn’t replace a doctor. Trust your gut here. If something feels seriously wrong, it probably is.
How to Choose Your First Aid Kit Container
The container matters more than you’d think. You want something waterproof, portable enough to grab in a hurry, and organized so you’re not digging through a jumbled mess while someone bleeds on the floor.
Hard plastic tackle boxes work beautifully. Soft zip pouches are great for travel. Whatever you pick, go for something with compartments or dividers. Think of it like a toolbox — chaos costs you seconds, and seconds matter.
Store-Bought vs. DIY Kit
Should you buy a pre-made kit or build your own? Honestly, the best answer is: start with a store-bought kit, then customize it.
Pre-made kits give you a solid baseline — bandages, gauze, tape, basic meds — without the hassle of shopping for twenty separate items. The downside? They often skimp on quantity and skip personal touches.
A DIY approach lets you tailor everything to your household. If you’ve got kids, you’ll want more kid-specific supplies. If someone has asthma or diabetes, you’ll add their essentials. If you’re a clumsy cook, well, you’ll want extra burn gel.
My advice: buy a decent starter kit, then spend a few minutes adding what your family actually needs. Best of both worlds.
Where to Store Your Kit
Location is everything. Store your main kit somewhere cool, dry, and easy to reach — a hall closet, a kitchen cabinet away from the stove, or a bathroom shelf. Keep it out of direct sunlight and away from heat, since heat degrades medications and adhesives.
Here’s a pro move: keep a second, smaller kit in the car and a mini one in your bag. You’d be surprised how often a stray bandage saves the day at a playground or a grocery store.
One more thing — make sure everyone in the house knows where the kit lives. There’s no point in having supplies nobody can find.
The Core Essentials: Bandages and Wound Care
This is the heart of your kit. If you only stock one category well, make it this one. Wounds are the most common household injury, and proper care prevents infection, scarring, and a whole lot of hassle.
Adhesive Bandages
Stock a variety of sizes. Tiny ones for finger pricks and paper cuts, standard ones for everyday scrapes, and large ones for bigger cuts. Butterfly bandages are worth including too — they help close small, clean wounds that might otherwise need stitches.
Buy more than you think you need. Kids go through bandages like candy, and there’s nothing worse than running out right when you need one.
Gauze, Medical Tape, and Wraps
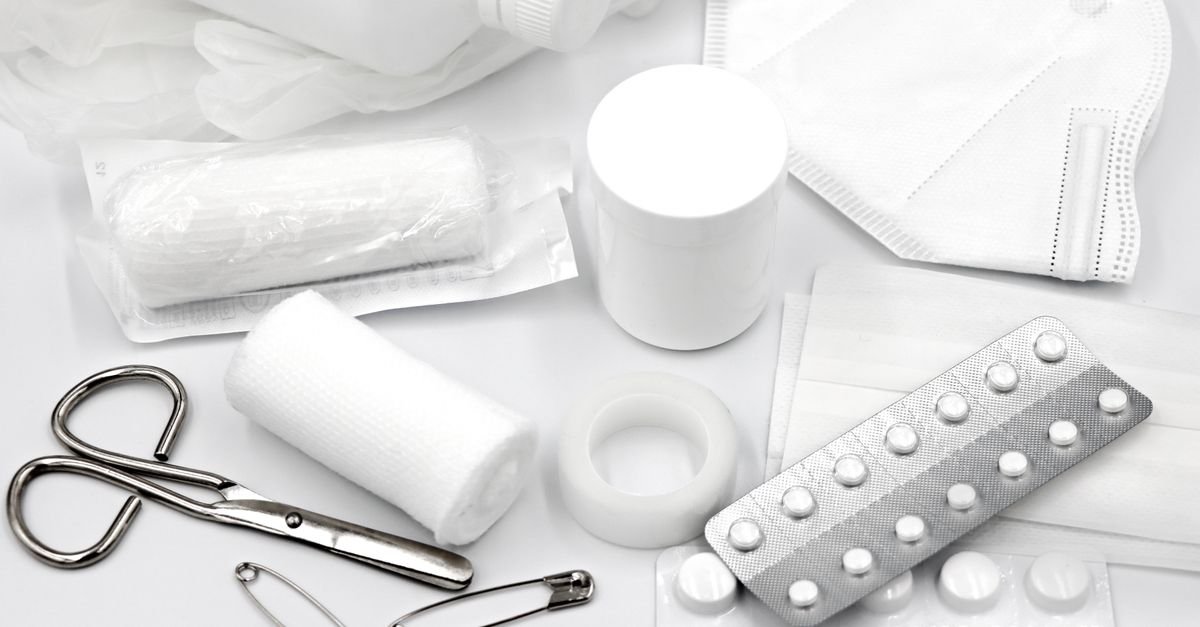
Adhesive bandages can’t handle everything. Keep sterile gauze pads in a few sizes, a roll of gauze for wrapping, medical tape to secure it all, and an elastic bandage or two for sprains.
Gauze is your workhorse for larger wounds and burns. It absorbs, protects, and covers. Roller bandages and self-adhering wraps hold things in place without sticking to skin, which is a small mercy when you’re peeling them off later.
Antiseptics and Ointments
You’ll want something to clean and protect. Include antiseptic wipes or a bottle of antiseptic solution, antibiotic ointment, and hydrocortisone cream for itching and rashes. Burn gel or aloe vera is a nice bonus if someone’s a frequent kitchen casualty.
Avoid pouring hydrogen peroxide on every scrape, by the way — it can damage healthy tissue. Gentle is better.
Cleaning a Wound the Right Way
Here’s the quick version: wash your hands first, then rinse the wound under clean running water. Gently remove dirt or debris with tweezers (sterilized with alcohol). Pat dry, apply a thin layer of antibiotic ointment, and cover with a bandage or gauze.
Change the dressing daily, or sooner if it gets wet or dirty. Watch for redness, swelling, warmth, or pus — those are infection signals that mean it’s time to see a doctor.
Tools and Instruments You Can’t Forget
Bandages without tools are like a hammer without nails. These small items make everything easier, and they cost next to nothing.
Scissors, Tweezers, and Thermometers
Keep a small pair of blunt-tip scissors for cutting tape, gauze, and clothing away from wounds. Tweezers handle splinters, ticks, and stubborn debris. A digital thermometer helps you track fevers, which is especially handy with little ones.
Add a nail clipper, safety pins, and a small flashlight or penlight. When you’re dealing with a wound at night, decent lighting is half the battle.
Gloves and CPR Barriers
Disposable nitrile gloves protect both you and the injured person. Keep several pairs, because you never know who’s going to be helping whom. A CPR face shield or barrier is a small, inexpensive addition that makes a huge difference in an emergency.
These items feel dramatic to keep around, but they take up almost no space and they matter when it counts.
Medications to Include
Medications round out your kit. Keep them in their original packaging so you always know what you’re taking, and store them in a cool, dry spot.
Over-the-Counter Pain Relievers
Include acetaminophen (Tylenol), ibuprofen (Advil or Motrin), and aspirin. Each one does something slightly different — acetaminophen for pain and fever, ibuprofen for pain, inflammation, and swelling, aspirin for adults in certain heart-related emergencies.
Note: aspirin should never be given to children or teens recovering from viral illnesses due to the risk of Reye’s syndrome. Keep that in mind.
Allergy and Digestive Remedies
Antihistamines like diphenhydramine (Benadryl) handle allergic reactions, itching, and bug bites. If anyone in the house has severe allergies, keep prescription epinephrine auto-injectors in the kit — and make sure everyone knows how to use them.
Add an antacid for heartburn, an anti-diarrheal medication, and oral rehydration salts for stomach bugs. Trust me, a stomach flu at 3 a.m. is not the time to realize you’re out of everything.
Checking Expiration Dates
Medications expire. So do ointments and antiseptic wipes. Set a reminder twice a year to go through your kit and toss anything past its date. Expired meds lose potency and can even become harmful.
Write the expiration dates on the outside of the box with a marker if you want a quick visual check. It takes five minutes and saves you from discovering a problem in the middle of an actual emergency.
Special Additions for Families with Kids
If you’ve got children, your kit needs a few extras. Kids get hurt more often, and their needs are a little different from adults.
Child-Friendly Medications
Keep children’s acetaminophen and ibuprofen in liquid form, along with a dosing syringe or cup. Never guess a dose — follow the weight-based chart on the packaging or call your pediatrician.
Include a children’s antihistamine, electrolyte solution for dehydration, and a nasal aspirator for stuffy little noses. Small scissors with rounded tips are also safer for trimming bandages on squirmy kids.
Comfort Items That Actually Help
Here’s something people forget: a scared child heals slower than a calm one. Toss in a couple of stickers, a small toy, or a colorful bandage. It sounds silly, but distraction is a genuine first aid tool.
A cooling gel pack, a favorite blanket, and a pacifier or small snack can turn a meltdown into a manageable moment. Comfort and care go hand in hand.
Items for Seniors and Chronic Conditions
If you live with or care for an older adult, tailor the kit accordingly. Include a blood pressure monitor, a glucose meter if relevant, and extra supplies for any chronic condition — inhalers, insulin, nitroglycerin, whatever the doctor has prescribed.
Add a magnifying glass, reading glasses, and large-print instructions. A pill organizer and a current medication list are smart additions. In an emergency, first responders will want to know what medications someone takes, and having that list ready can save precious minutes.
Also consider a medical alert bracelet or card, and keep emergency contact numbers taped inside the lid of the kit. Simple, but invaluable.
Emergency and Disaster Preparedness
A home first aid kit is step one. A broader emergency supply stash is step two. If a storm, power outage, or evacuation ever hits, you’ll be glad you thought ahead.
Keep extra water, non-perishable food, a battery-powered or hand-crank radio, spare batteries, blankets, and a multi-tool. Add dust masks, a whistle, and a manual can opener. If you take prescription medications, aim to keep at least a week’s supply on hand.
Think of it as insurance. You pay a little attention now so you’re not scrambling later.
Beyond the Kit: Important Documents
Store copies of essential documents in a waterproof bag near your kit: insurance cards, ID, medication lists, emergency contacts, and a family communication plan. If you had to leave your home in a hurry, these papers would matter more than almost anything else.
Digital backups help too. Snap photos and store them in the cloud. Redundancy is your friend.
How Often Should You Restock Your Kit?
At least twice a year. Pick two dates you’ll actually remember — daylight saving changes work great — and go through everything.
Here’s a quick checklist for your audit:
- Check expiration dates on all medications and ointments.
- Replace any used or missing items.
- Make sure adhesives still stick and packaging isn’t damaged.
- Confirm batteries in flashlights and thermometers still work.
- Update medication lists and emergency contacts.
- Restock gloves, gauze, and bandages to full quantity.
After any real use, restock immediately. Don’t wait for your twice-a-year check — you’ll forget, and the next emergency will catch you short.
Conclusion
A home first aid kit isn’t glamorous. It sits in a cabinet, quietly gathering dust, until the day it doesn’t. But that’s exactly the point — it’s there for the moments you can’t predict and the injuries you’d rather not think about.
The formula is simple: stock the essentials, customize for your household, store it somewhere accessible, and check it twice a year. Bandages, gauze, antiseptics, tools, medications, and a few personal touches. That’s it. No medical degree required.
So here’s my challenge to you: go look at your current kit right now. Is it complete? Is it organized? Could you find a bandage in under thirty seconds with the lights off? If the answer is no, you know what to do this weekend.
Prepare once. Relax forever. Your future self — bleeding finger and all — will thank you.
FAQs
1. What are the absolute must-haves in a home first aid kit?
At minimum: adhesive bandages in assorted sizes, sterile gauze pads, medical tape, antiseptic wipes, antibiotic ointment, scissors, tweezers, disposable gloves, a thermometer, pain relievers, and antihistamines. Those cover the vast majority of everyday household injuries.
2. How often should I replace items in my first aid kit?
Check it every six months and replace anything expired, damaged, or used. Medications typically expire within one to three years, and adhesives lose their stick over time. Restock immediately after any real use.
3. Can I use hydrogen peroxide to clean wounds?
It’s better to avoid it for routine wound care. Hydrogen peroxide can irritate tissue and slow healing. Clean running water and a mild antiseptic are gentler and more effective for most minor wounds.
4. Where is the best place to store a first aid kit?
Pick a cool, dry, easily accessible spot — a hall closet or kitchen cabinet works well. Keep it away from heat, moisture, and direct sunlight, and make sure everyone in the household knows exactly where it is.
5. Should I buy a pre-made first aid kit or build my own?
Start with a quality pre-made kit to cover the basics, then customize it for your family’s specific needs. This saves time while ensuring you have everything relevant to your household, from children’s medications to chronic condition supplies.